Wow, long time no post, but we've been frankly exhausting ourselves with this project. Lemmessee, where did we leave off?
 |
| We finally got done with the damned Epoxy. |
After a lot of trial and error and cursing and everything we own either being sticky or ossified, we finally completed epoxy on the hull. The seams, as aforesaid, are done in 6 oz tape, which is doubled on the leading edges to help protect them. The whole hull up the to gunwale is covered in 4 1/2 oz biaxial cloth, and then two coats of epoxy over the whole surface.
 |
| The squeegee proved a much better tool for applying epoxy than a roller or brush. |
While still slightly tacky, we applied the bottom paint (Interlux ablative) to make a chemical bond.
 |
| So glad to see the bottom paint go on. |
AAAAAAND we messed up. By the time we finished the hull, some parts had fully cured and the bottom paint crazed off. We were forced to do a bit of scraping and sanding on those parts that didn't fully adhere and then to recoat.
Finally, though, we got a double coat of decent antifouling paint, and then gave it a couple of days to cure.
Now we come to the scary part: Turning over the boat hull. I frankly had no idea how this would go, I just knew we would need a lot of hands. Kyle at the Marina floated using the sling lift or fork lift, but at this stage the boat had no internal structure, so I was more than a bit leery of that. We managed to assemble five people and tried to lift the thing. We did, but it was far to heavy to be safe (I'm figuring that, by this point, the hull is around 8-900 lbs). We sent out scouts and managed to get our number of helpers to nine, picked up the beast, moved it over ten feet, then set it on it's starboard side, and gingerly walked the thing down onto some 2x4s.
I wish I had more pix of that, but all hands were . . .well. . .more than somewhat occupied. Many, many thanks, though to those who pitched in.
 |
The hull was surprisingly solid when we turned it, no creaks or groans. It didn't seem to flex at all.
|
Then we covered the thing and hid from the rain for two days. The cover leaked. The thing was a swimming pool, but at least it held water. We used a wet/dry vac to suck the water out, swabbed the inside, and let the sun dry her out.
 |
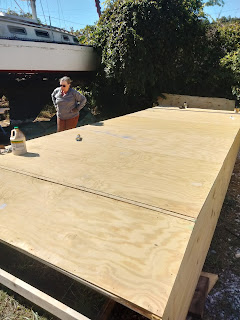
| Sole going in. |
We now began putting in the sole, inslulating between it and the hull with Reflectrix (it's a kind of silvered bubble wrap), and putting spacers along the chine to support the flooring.
 |
| Foiled again. |
Having gotten all that done, we began contemplating getting the walls up.
 |
| I would be more badass if everything didn't hurt by this point. |
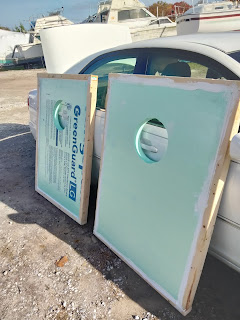
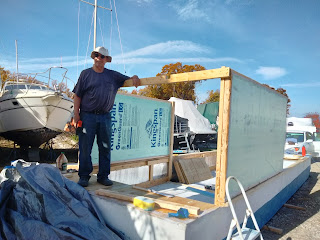
The walls are 2" foam, framed in 2x3, caulked and screwed into place, and will be coated on the outside with an elastomeric coating and inside with an exterior latex. The foam sheets are spendy (about $52 each) but when you combine the light weight and insulative properties, they actually are a bit of a bargain.
 |
| Foam sweet foam. |
 |
Meanwhile, gail started insulating the side walls.
|
One of the problems with building like this (that being, in an open field with no strongback) aside from rain and wind is that it's really hard to keep things squared. As I said with the original
Floating Empire, "Welcome to the Temple of Accumulated Error" (with apologies to Domebook II, if memory serves).
 |
| The framed foam walls are light and surprisingly strong. |
 |
| Roughed (and I mean roughed) into place. |
 |
| The framed walls (4' 3") will give us 6' 4" over the sole of headroom. |
 |
| Closing in. As we're using membrane foor the roof like the original Floating Empire, the roof structure is just simple sheathing. |
 |
| With doors and everything. Things coming together more quickly now. |
 |
| Wave, Gail. |
 |
| Excuse the blurry fisheye, but once the interior is enclosed, we now have a place to store tools and materials that isn't the back of my freaking car. As a live-abord, our cars already look like a homeless person lives in them. White box to the left is the water tank, ready to go under the stern deck. |
 |
| And here we are thus far, ready for paint and for the roof to go on. |
So here we are thus far. It's raining off and on all day, but tomorrow we'll finish the forward hatch and get the actual roofing on, then it's on to finish the interior, the galley, and the paint work.
We both agree that this project has been good for the both of us, both physically and emotionally. During the building of the original Floating Empire, I lost nearly 35 pounds just from the effort, and that seems to be happening again, so if you want a great excuse to build a boat, just convince your spouse that you need to lose weight.
More shortly, stay tuned.
M


